Storytelling
Storytelling is the Third property of Widgets, which allows Users to navigate through specific layers in your project in a chosen order.
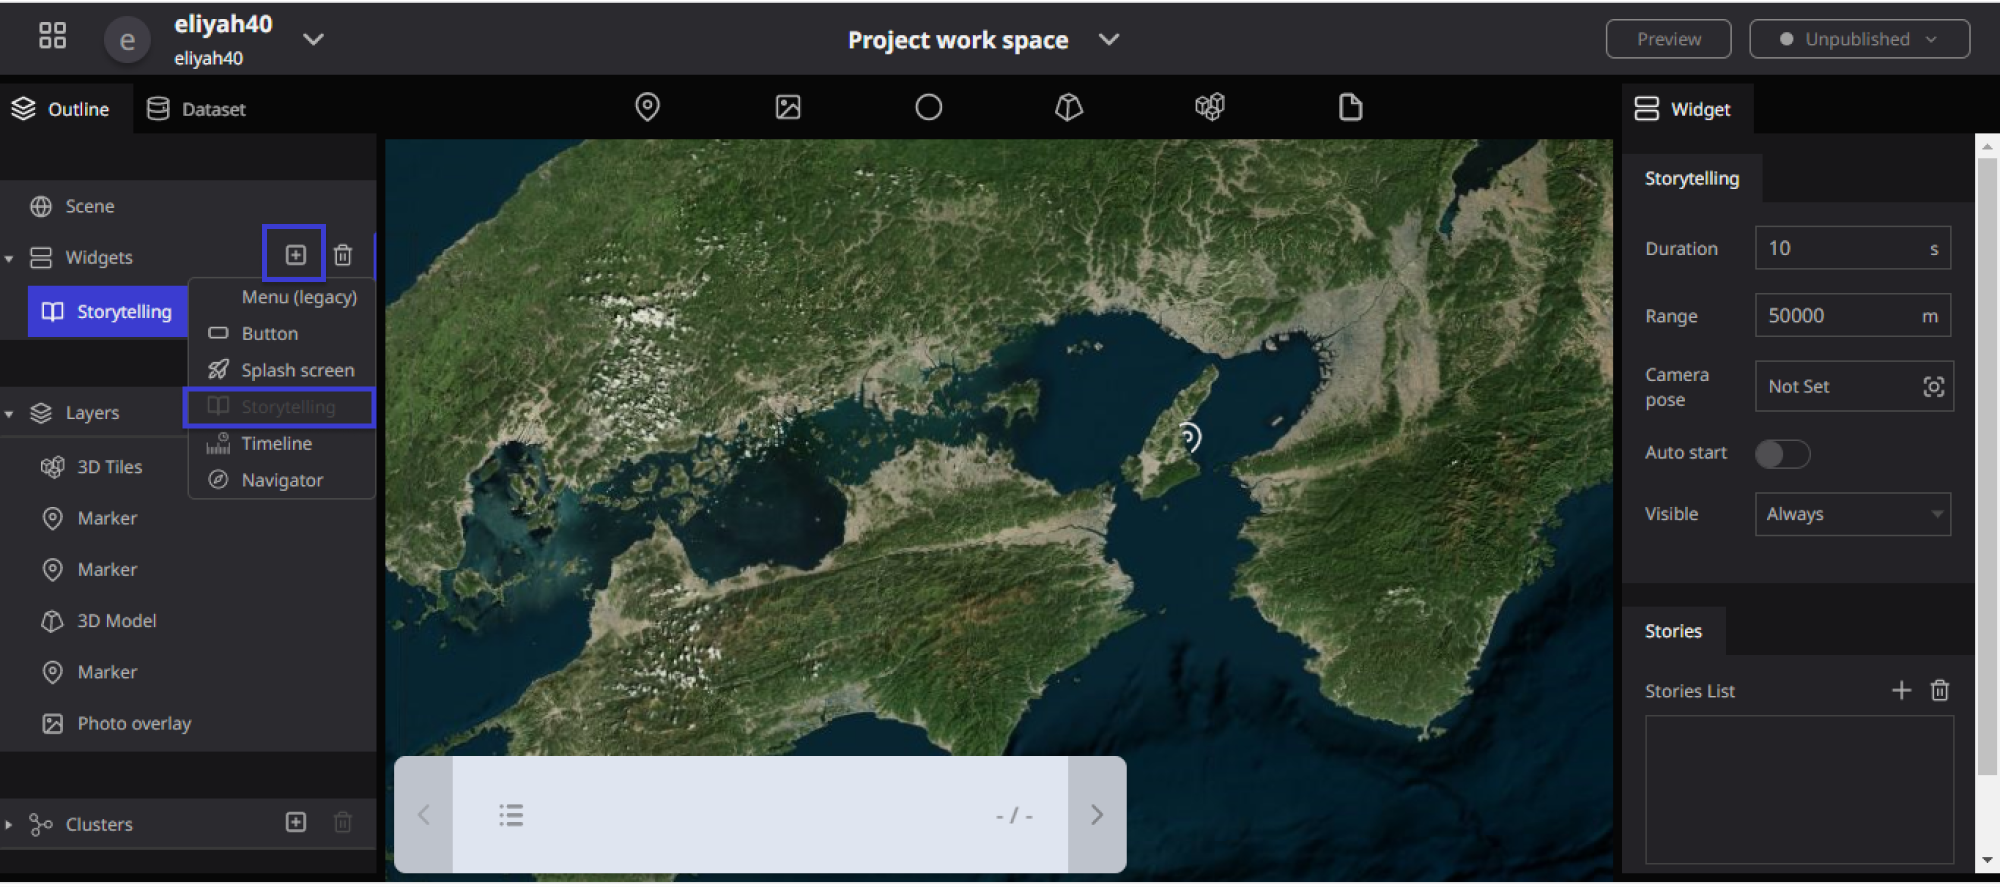
Enable storytelling
Click on the Plus sign (+) in the left corner of the Re-Earth project Workspace, then select Storytelling to Enable it.
To Start Storytelling
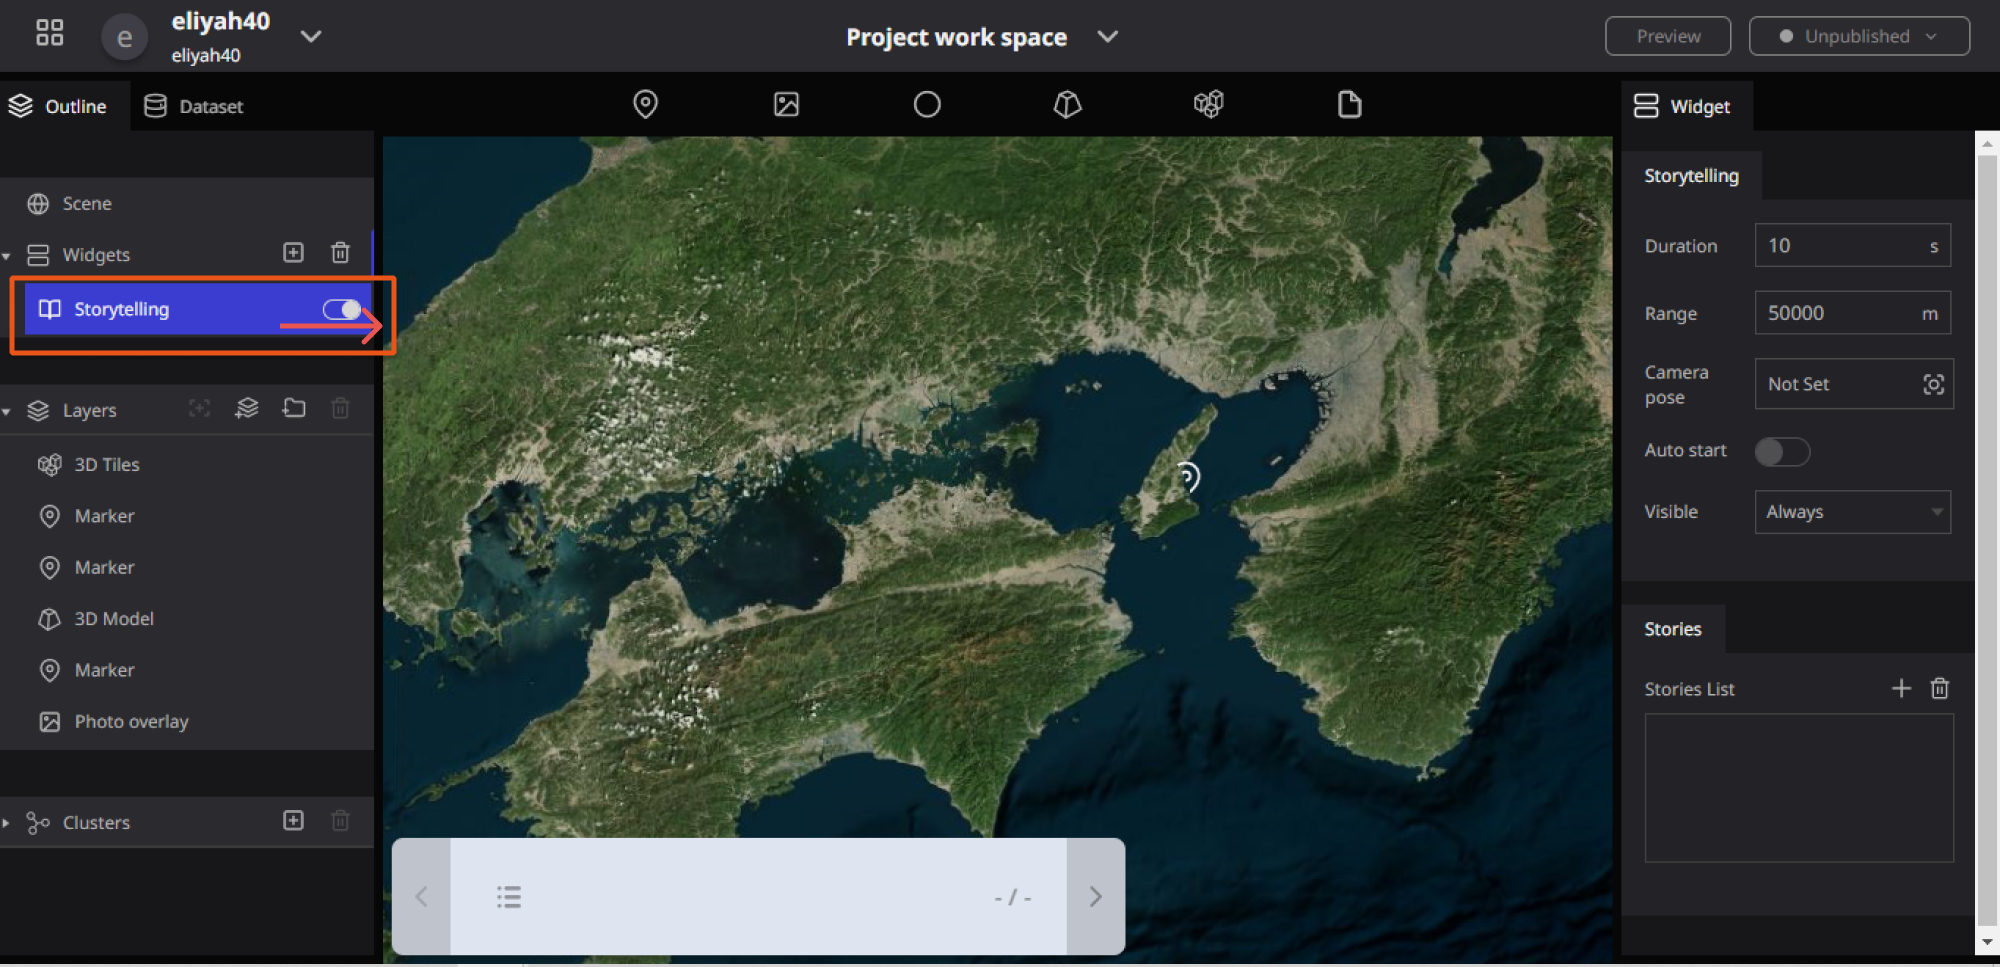
Clicking on Storytelling in the widgets section of the left panel will make the storytelling settings toggle appear on the right panel. Click the Enable toggle to start using storytelling.
Function of Storytelling
Two main parts that make up Storytelling Functionalities are “Storytelling” and “Stories”.
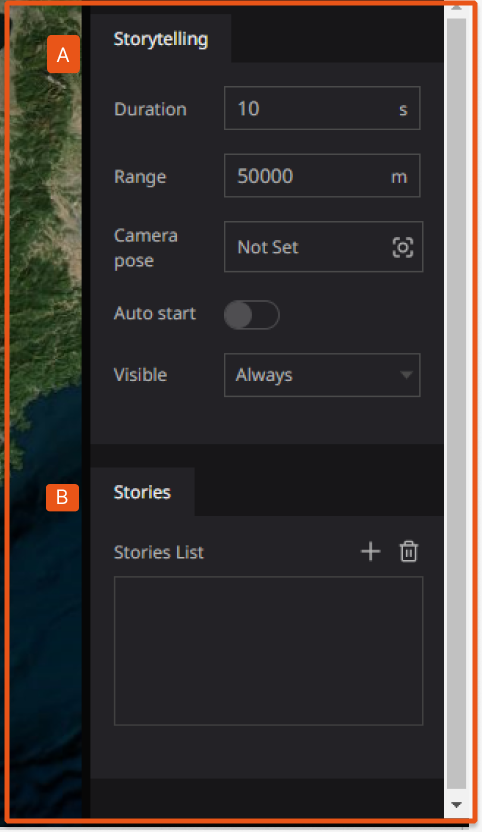
Storytelling contains the following properties: Duration, Range, Camera pose, Auto Start, and Visible.
Stories are where you can add the Stories list, which can be done by clicking the plus sign( +) in the Stories section.
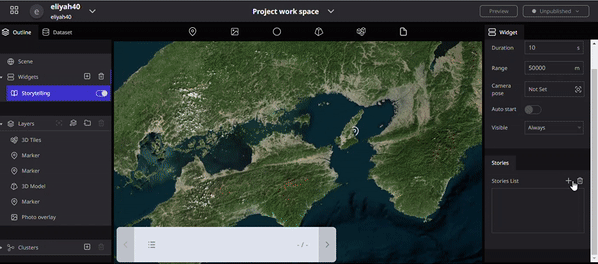
Properties of Storytelling and Stories.
The following are properties of Storytelling and Stories
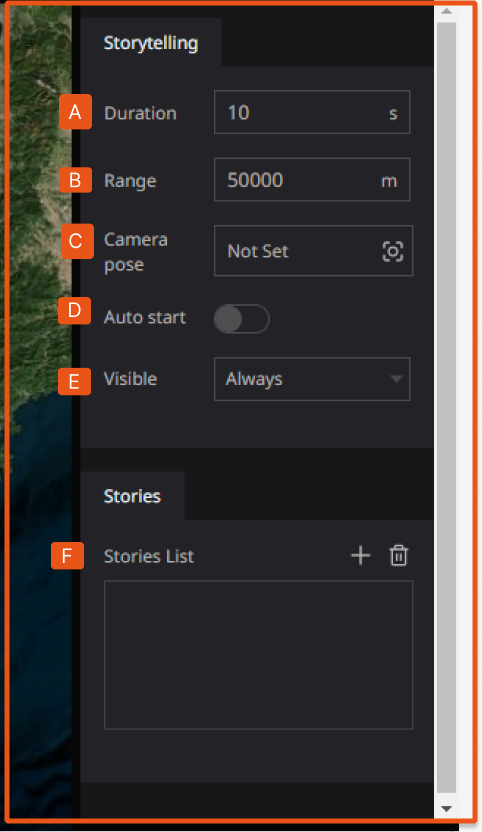
Duration: is one of the functions of Storytelling in the Re-Earth App, Users can determine the Length and time of their storytelling using Duration.
Overall, the concept of duration in the Re-Earth App is essential for measuring and understanding the passage of time, whether it is in the context of a specific project or in the broader scope of the universe.
Range: specify the distance from the layer to the camera. It also Specifies the distance from the specified point to the camera.
Camera pose: it is one of the essential parts of Storytelling which has the following functions:
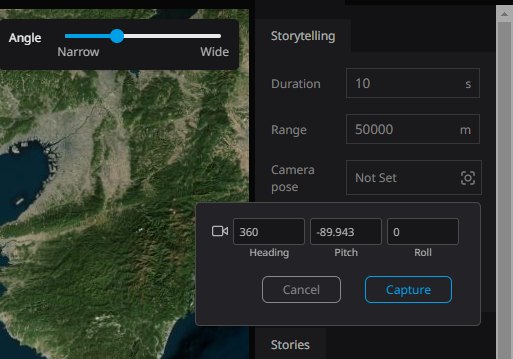
How to use the Camera Pose
Specify the position of the camera. Click on the Not Set column next to the camera to open the camera position setting window. Enter a numerical value or adjust the camera position on the digital earth and click Capture to specify the camera position.
Auto start: When turned on, the storytelling feature will start from the first item when the project is Launched.
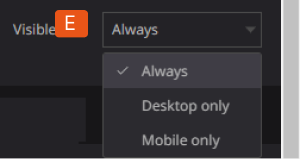
Visible: Users can select the visibility of Storytelling in different formats such as Always, Desktop only, and Mobile only
Stories
This is the setting where users can choose which layers will be shown and in what order while using storytelling.
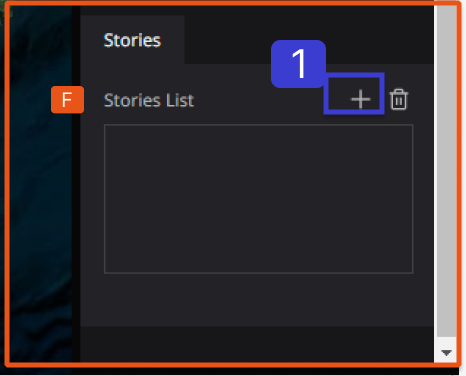
Click on the + sign in the Stories List to add a list of Storytelling that will be displayed once the Project is launched.
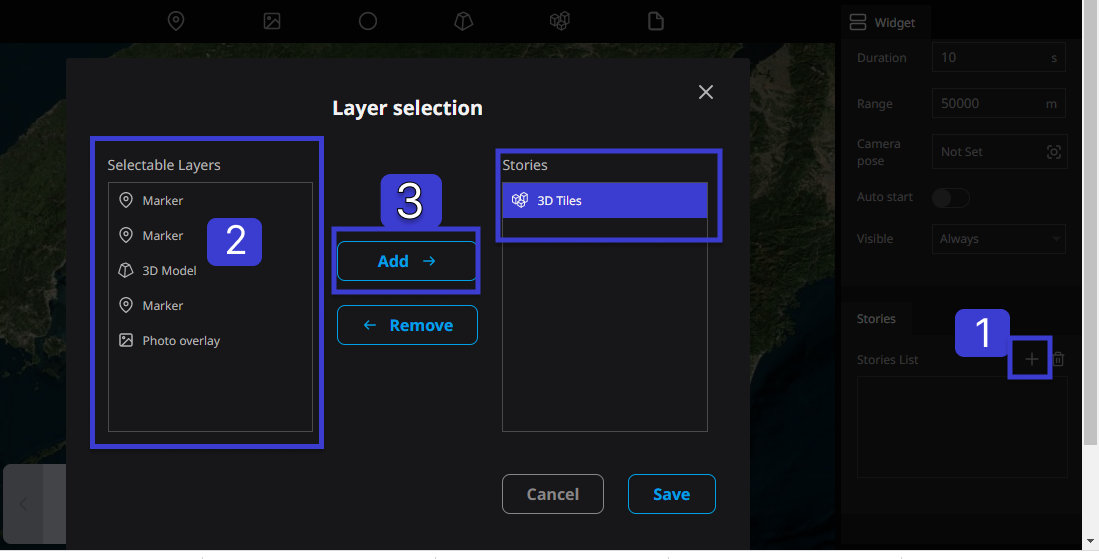
Once the Layer selection is Opened, Select the Layers you want to display as storytelling from the selectable layers box, Then Click on Add to Add the Layer to the Stories box
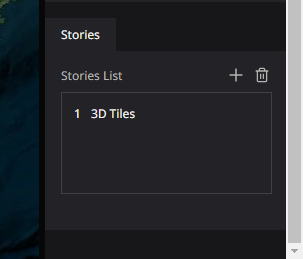
From the Output, you can see that 3D Tiles have been added to the Stories List in the Stories Box.
Illustration of Setting up Storytelling in the Stories Box
Camera settings per item
The camera angle of view and camera position during storytelling can be set for each item.
Please select the item you have added to the stories list to set up the Camera view.
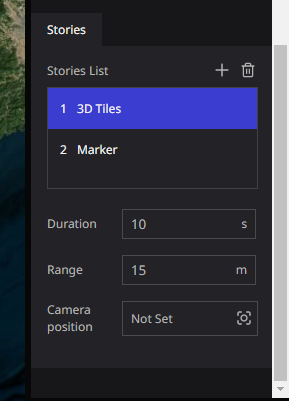
- Duration: Specify the time (in seconds) it takes to move between layers.
- Range: Specify the distance from the specified point to the camera.
- Camera: Click the
Not Setcolumn next to the camera to open the camera position setting window. Enter a numerical value or adjust the camera position on the digital earth and clickCaptureto specify the camera position.

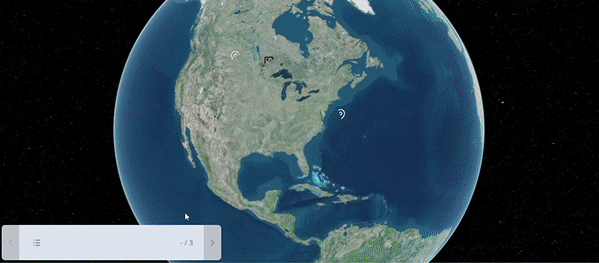
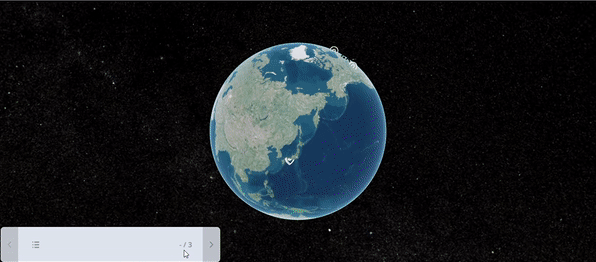
Performing Storytelling
For projects with the storytelling feature enabled, a storytelling menu will appear in the lower-left corner of the screen.
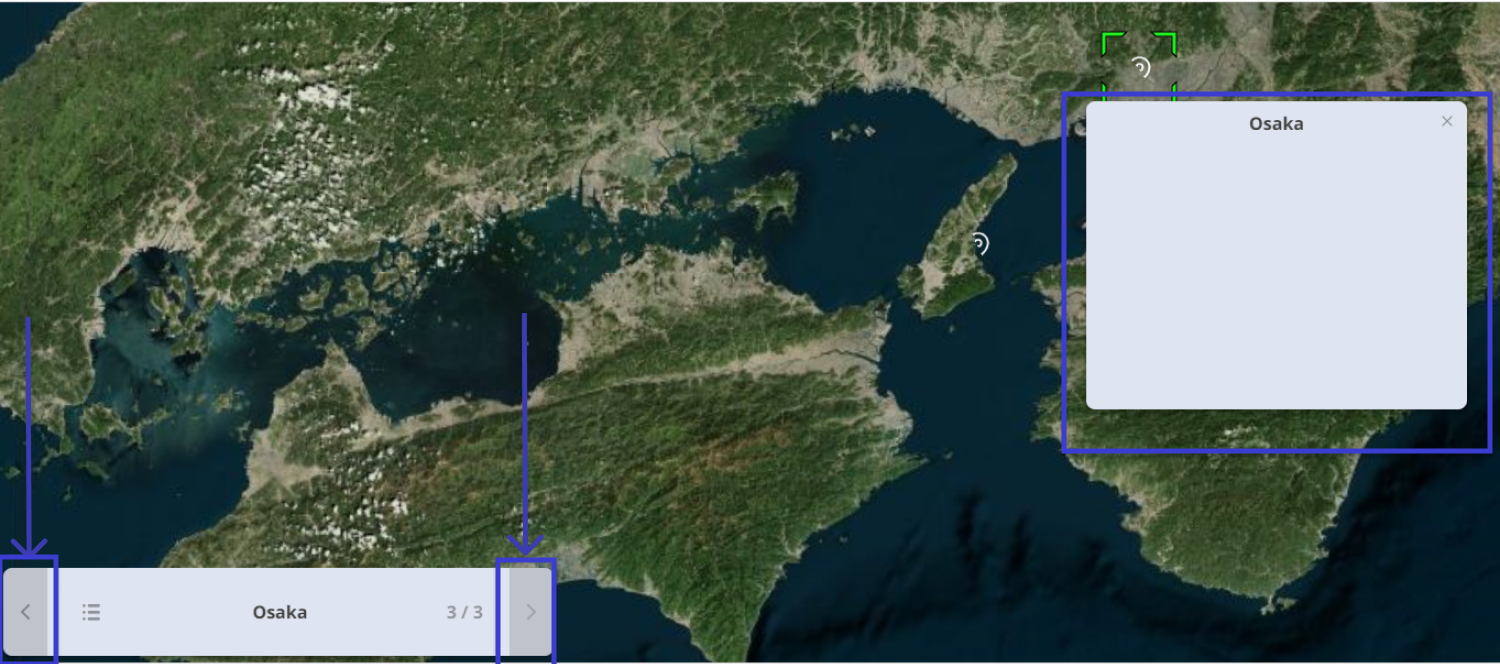
Use the > buttons to move to the next layer and the < buttons to move to the previous layer.
In the storytelling function, an info box appears at the same time you move layers.
Click on the select icon on the left of the storytelling menu to display the story list.
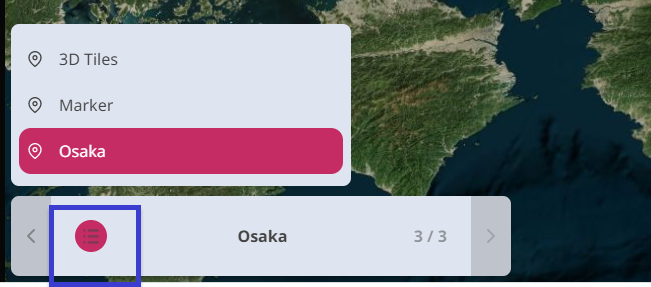
You can also directly select and move the corresponding layer from here.
NOTE: This function can start functioning after you set it up and then preview or publish your project
Illustration of Performing Storytelling